Like many of us, Ann loves the look of ornate antiques.
She used our Raised Plaster Chaumont panel on the doors of an old cabinet to give it incredible new life.
First, she did a translucent color wash over the entire door to give it a lighter appearance, but also to allow the wood grain to show through.
She then painted the inner panel a warm, rich brown.
Once that was dry, she added our Raised Plaster Chaumont Panel Stencil directly in the center of each cabinet door.
She succeeded in giving her project an “Old World” beauty that could be mistaken for a very old piece of furniture.
Thank you Ann! We love it!
Debbie Sharp is obviously a gal with vision and creativity.
When I opened her email and saw this beautiful version of our Raised Plaster Anastasia Stencil, I was just amazed at what that beautiful background did for our lovely plaster stencil design.
Here’s what she wrote in her email:
“I want to say thank you for the stencils that you create….I love the one I purchased…and the service was amazing. This is what I made from your stencil using venetian plaster and Amy Howard milk paint colors. I am a current student of Amy Howard’s Old World Finishing Course. I love how this came out!!! Beautiful stencil and I will be back for more as soon as I can”.
Debbie has obviously found her sources for true inspiration. The depth of the background, with it’s lights and darks against the raised design create a visual dimension that is just mesmerizing!
Thank you for sharing Debbie!
Darla Dawald has been a long time Victoria Larsen customer. I love it when she shares her creations with us. Who wouldn’t be inspired by her lovely work?
She shared these wonderful tables with us where she used our Plaster Lizard Texture Stencil on table tops. Wow, don’t they look high end?
Raised Plaster Lizard Texture Stencil
Look how lovely and ultra detailed the surface came out!
In her email, she lists exactly what she did for you:
Hi Victoria,
I wanted to share the completed end tables with the VL Crocodile stencil with raised plaster, with you.
I used Snow White general finishes paint on body, then I painted the top in a dark gray. Tinted the plaster with black acrylic paint to make it dark gray. Applied the stencil 3 times across the center then taped off sections to complete the raised plaster stencil on top and bottom 6 times. It took some time but I’m happy with the result.
I then used the modern masters metallics in platinum with glaze. After it dried I used the silver tinted slightly with black as a glaze to achieve the depth. I poly sealed it in satin General Finishes with 4 clear coats on the top only. The General Finishes chalk paint on the body doesn’t require waxing or seal (which I love).
Just listed them for sale.
Feel free to use my photos.
Darla Dawald
Darla’s techniques can be used on any piece of furniture or even to create a high end looking accent wall in a powder room. I love how it came out! Don’t you?
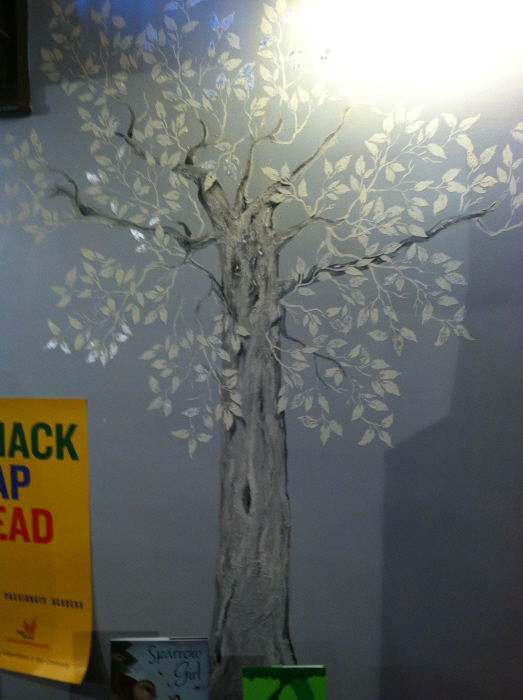
Wendy Beeker loved the idea of a large tree on her walls, but she wanted a massive trunk and lots of branches!
She created the trunk on her own, using joint compound and paint, which was easy and fun. She made it rough and rugged and awesome.
But creating all those leaves would have been a real chore, so she chose to use just the branch from our Raised Plaster Aspen Tree Stencil Set.
Once the branches were in place, she painted every leaf with metallic gold paint. Now that tree shines with glory!
Plaster stenciling real looking stone isn’t hard at all.
Sue Thompson loves the look of stone. But who can afford to have an entire interior wall done in stone by a mason? It’s a pricey job!
Sue found our Raised Plaster Stacked Stone Stencil and was elated to find out she could create the look herself with simple joint compound (about $12.00 a bucket!).
She first painted the wall the color she wanted the grout between the stone and then simply repeated the stencil over the walls to give that raised stone pattern. A quick wash of pale brown paint mixed with translucent wall glaze brought out even more detail in the stones by collecting in the natural recesses of the dried joint compound.
The corners were easy to accomplish. Simply flip the stencil over backward on the adjacent wall and line up to the previous stenciling then continue.
Now, can you look at that photo and tell me it isn’t absolutely REAL?