Description
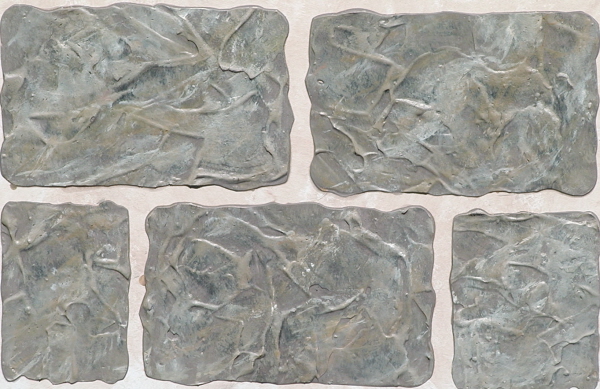
Easy to repeat! Turn your walls in to very realistic stone brick with this stencil. The bricks are 7 1/2″ x 4 1/2″ each with two large bricks on the top and one center set brick with two 1/2 bricks on each side on the bottom for “end of the wall” treatments.
You can do your bricks in any colors you choose! How about browns and deep reds for that “common” brick look. Grays for softer more neutral bricks, or even greens and cream with splashes of silver here and there. There is no end to what you can do! Painting your wall the color you would choose for your “grout” eliminates the need to go back and then add grout color after the plaster is applied.
Here’s how to create varied color bricks so easily:
Put some joint compound in to a separate container.
Add a bit of two different colors (I used black and rust brown for mine). Take your trowel, plastic scraper or a spoon and just “swirl” the colors together to slightly blend. You actually want to see all three colors (the third being the white of the joint compound).
Now, scoop some of this mixture up and smear it over a piece of cardboard or newspaper as a test. This gives you the opportunity to play a little bit with just how you like yours to look. Now, do the same to the stencil.
I smeared mine in one direction but you can do as you wish. Try NOT to blend the colors too much. Having distinct separation of color makes it totally look real.
Peel the stencil back carefully. Remove any smudges with a Q-tip then let dry and repeat. Any stone stencil can be done this same way.
Becky Sheilds used this brick stencil in a niche in her dining room that turned out really cool.
She painted over the entire wall including the brick design and then used a dry brush technique (which is taking an artists brush dipped in paint then wiping off all excess) so go back and deepen the color just here and there on each brick.
Brick stencils can also be used to give your patio the look of a real brick pation when you use porch and floor or concrete paints.


