Skip to content
We Proudly Offer Free Shipping!
Home
About Us
Shop
FAQ
Contact Us
Menu
Home
About Us
Shop
FAQ
Contact Us
$
0.00
0
Account
blog
Category: Furniture Make Overs
Home
Category: Furniture Make Overs
Angela Perrone Wows with this Chest Makeover
December 28, 2023
No Comments
Holly Kellen Gives a Plain Chest a Total Makeover
February 1, 2023
No Comments
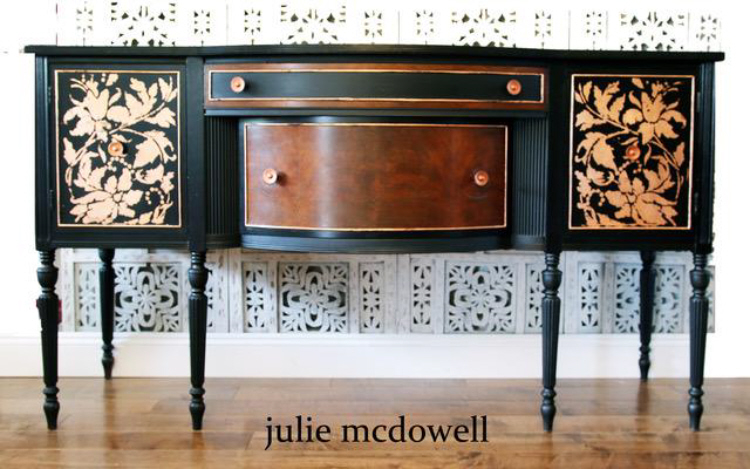
Julie McDowell’s Creative Art
December 12, 2022
No Comments
Julie McDowell uses our stencil to give a chest a brand new look
April 10, 2022
2 Comments
D Starns dresses up an old chest elegantly!
September 30, 2021
No Comments
Ann Creates the Look of Antique Cabinet doors
September 28, 2021
No Comments
Anne Now Loves her New Cabinet Design
July 27, 2021
No Comments
Sandra Pletcher’s gives new life to an old chest in such a pretty way.
July 22, 2021
No Comments
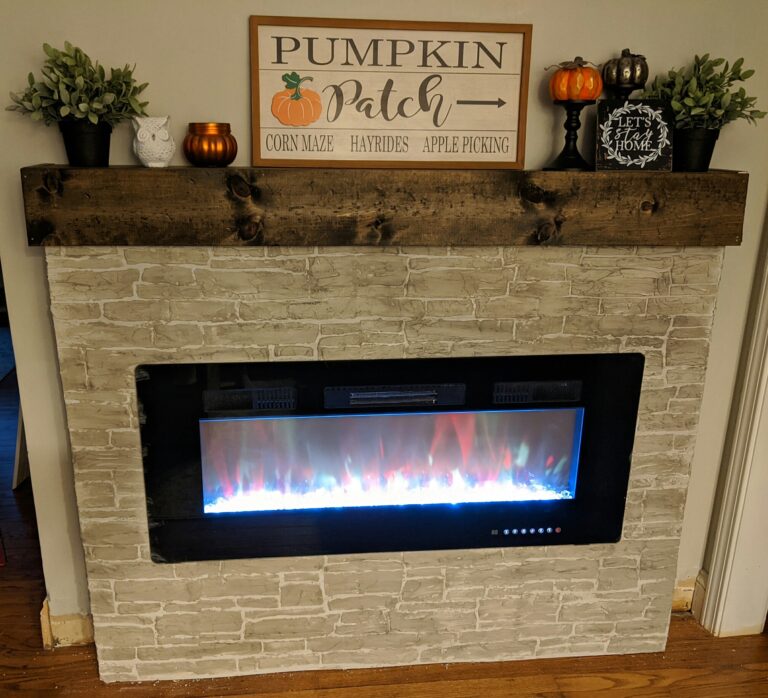
Dawn Weiss gives her fireplace the look of stone the easy way!
January 11, 2021
No Comments
Colten’s high end make over of an old vanity
January 11, 2021
No Comments
Page
1
Page
2
Page
3
Page
4
Page
5
0
0
Your Cart
Your cart is empty
Return to Shop