A Road Side Find Turns in to a Princess Chair with Plaster Stencils
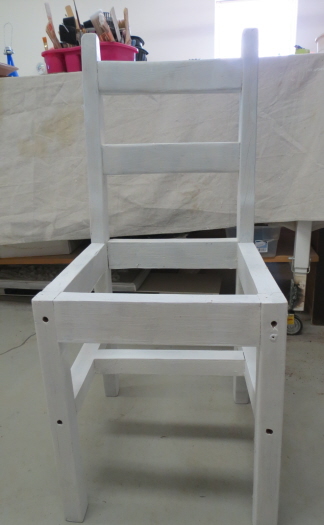
Yes, I really did find it at the end of my road, laying there on the ground. No seat, just a frame of nasty wood.
I HAD to haul it home and do something with it.
I’d seen on Facebook where people were turning old chairs like this in to garden planters, but that didn’t really hit me as a fun project to do.
I thought “princess chair” because it’s such a small chair and perfect for a little girl to sit on.
I first sanded and primed it, then decided it needed plaster stenciling to create a raised design on the back rails and around the bottom.
On furniture, I like to use pre-mixed tile grout because it dries rock hard and stays put.
I applied the grout to the stencil and then peeled it off to reveal the new design.
There are some strange holes on the fronts of the legs and I just happened to have two cute rose droplet resin appliques that would be perfect to cover the top two holes. I glued them in to place.
I then painted the entire chair and it’s embellishments with gray paint.
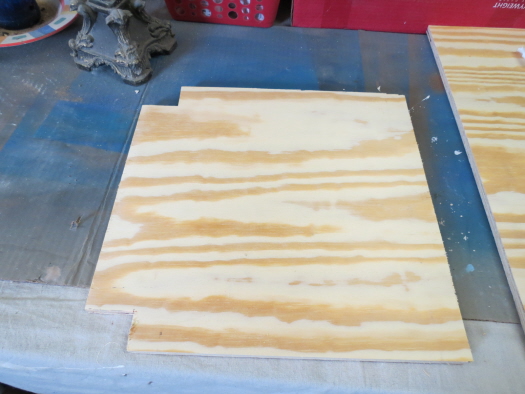
To create a new seat, I cut plywood to match the top of the chair.
I then used one of my new stencils to add a pretty design in metallic gold paint to a section of gray satin I had lying around in my material box.
I cut foam rubber to match the seat size, then created the finished seat with my electric staple gun. Tug, staple, tug, staple and it was done!
I finished the chair by replacing the stencil over the raised designs and stenciled them with the same metallic gold paint, adding it to the resin appliques as well. I added antique brown wax at various edges of the chair to give it more detail, blending well with an old terry towel.
The finishing touch was to glue gold fabric cord to the bottom edge of the cushion to complete the look.